Tuesday, April 24, 2012

Finding My Inner Fisherman

My husband tells me all the time, "you should of been a fisherman!"  He is usually referring to the knots and nets that I make using crochet.  Maybe though, that is why I am drawn to my little fishing town....deep down I am a fisher-woman at heart. 

Being drawn to knot type crafts, friendship bracelets, crochet, macrame....somehow I have never picked up a knot book.  After the tax deadline, my boss usually gives all of us a small bonus.  I almost always have to use it responsibly and this year was no different, but I did decide to buy myself something.  A little treat for my hard work.

I decided on buying the book "Decorative Fusion Knots"(I have not been paid to talk about this book)


This book was well worth the money I spent on it.  It arrived in the mail yesterday and I spent all night tying knots.  Even if I never pick up this book again, it has already served its purpose.

I only kept a few of them tied and after a while wished I had a different color to experiment with.  A trip to the hardware store for some rope is definitely in my future.

Some things to make with knots....
  • Earrings
  • Necklace
  • Key chain
  • Barrett
  • Rug

Tuesday, April 10, 2012

'Cause I am the taxman

Let me tell you how it will be
There's one for you, nineteen for me
'Cause I'm the taxman, yeah, I'm the taxman

Should five per cent appear too small
Be thankful I don't take it all
'Cause I'm the taxman, yeah I'm the taxman

If you drive a car, I'll tax the street,
If you try to sit, I'll tax your seat.
If you get too cold I'll tax the heat,
If you take a walk, I'll tax your feet.

Don't ask me what I want it for
If you don't want to pay some more
'Cause I'm the taxman, yeah, I'm the taxman

Now my advice for those who die
Declare the pennies on your eyes
'Cause I'm the taxman, yeah, I'm the taxman
And you're working for no one but me.

-Taxman, The Beatles


It is the same each year....April....taxes....ugh!  Why oh why do I work for tax accountants?  Most of my creativity goes straight out the door this time of year, not for lack of wanting to be creative, just the pure exhaustion sucks it right out of me.

For my Birthday this year, in late March, my wonderful husband bought me a Honda Ruckus!  It is the most bad a$$ 49cc motor scooter.

Before Modifications

This Scooter gets 100 miles to the gallon, and has an under the seat storage space.  It will only get up to 40 mph but the speed limit around town it only 30 to 35mph.

The first thing I did when I brought it home was find some cord/rope to make a net around the under the seat storage area.  With some paracord and crochet hook in hand, I started at one end and worked around....

I started by wrapping the paracord around the frame.

Left side done, then I mirrored what I did on the right side, then the front.


My punk rock ride!  Notice the flame mirrors, skull "bad to the bone" helmet, and skull decal on the gear box.  Next up a basket for the front.


Thursday, March 29, 2012

Progress, but not finished.

Remember this project

Every Saturday I get together with a good friend and we crochet.  When we started this almost two months ago, she pulled out a granny square blanket, that she had started 25 years ago.  Seeing her working on her blanket and watching it come together has drawn me towards my own "six year blanket". 

At this point all the flowers are finished, and they are all attached to each other. 


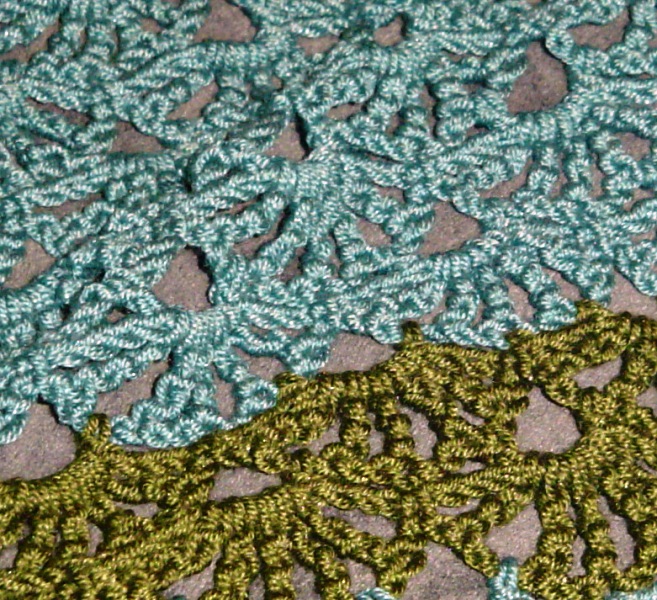
I am finding the biggest challenge with this blanket is the shape of the flowers.  They are Pentagons, so attaching them together has created large gaps, but I think I have finally found the solution to this.  I am determined to finish this blanket!


Tuesday, March 20, 2012

That time of the year...

This is the time of year I hate, April 15th, taxes, deadlines, cranky accountants.....ugh!  As you can see the last post was on March 6th, this means I have been overworked and any free time is being devoted to chores at home, and rest.

About a month ago I did some cleaning out of my craft room, and when I did I came across a counted cross stitch kit my mother in law gave me.  It has been sitting unopened for a long time so I thought I would work on it here and there when I wanted to relax but keep my hands busy.


Will post this project periodically so show the progress...Can you guess what it might be?

Tuesday, March 6, 2012

Peace at the Poker Table


Every Friday night is Poker night at my house, and has been for the last five years.  As of late there has been a bad egg in the group that has created lots of drama.  Poker night is supposed to be a fun night.  It is not a place for getting picked on, yelled at or any negativity!

My husband asked me to create a sign for the shop/poker room.  He wanted it to say, "No getting mad at how others play cards."

This is my interpretation.


Wednesday, February 22, 2012

What's For Dinner


Every day it's, "What do you want to have for dinner?"  It is a frustrating process when you don't have anything planned.  I have actually ventured to the store, after work, without a plan, and walked up every aisle just to put together a dinner.  Ridiculous!  In an attempt to organize life better, I created a Weekly Menu board, which I will update every Sunday. 

After searching on Pinterest, and google, I found some layouts that I liked and got started on gathering the supplies.

Supplies I used:
A deck of old playing cards.
2 old playing card boxes
Acrylic Paint
Close Pins
Dimensional Paint
Beads
Scrap booking Card stock
Hemp Cord
3 magnets (to keep it from swinging around)
Removable Hook


Monday, February 20, 2012

Bringing Outdoor Fun Inside

Not sure where the idea to make an indoor Hop Scotch came from (somewhere on the internet), but I knew I needed to make one for my niece.   


Materials Used:
Craft Felt
Acrylic Paint
Non-slip Shelf Liner
Scrap Fabric and beans, for Bean Bags

Directions:
Plan out the layout.
Paint numbers on each of the rectangles. I had to paint three to four coats on each.
Sew together; take #3 and #4, put right sides together and sew middle seam. Do the same with #6 and #7.
Next, take #2 and overlap the bottom edge 1/2" on top of the top edge of #1, sew together. 
Take #3/4 and overlap the bottom edge 1/2" on top of the top edge of #2, sew together.
Take #5 and underlap the bottom edge 1/2" underneath of the top edge of #3/4, sew together.
Take #6/7 and overlap the bottom edge 1/2" on top of the top edge of #5, sew together.
Take #8 and underlap the bottom edge 1/2" underneath the top edge of #6/7, sew together.

Pin Non-slip Shelf liner on the backside starting at #1, up to #8.  Sew the together along the outside edge.  Trim excess.  Measure and cut additional rectangles to sew to the back side of the outer edges of #6, 7, 3 and 4.


Bean Bags:  Using scrap material cut four, 4" squares, sew three sides, fill with 1/4 cup beans, sew fourth side.


Friday, February 17, 2012

Just Add Water


My first attempt at a hemp twine pot holder.  This pot holder has been in the "work in progress" pile for some time.  It is the third or fourth try, and has been looked over because up until last night it was curled up and distorted.  I just could not get the two different sizes to lay right with each other.

After doing a major clean up of the craft room I looked at this and it dawned on me....just block it!  So to the sink it went.  Amazing what a little bit of water will do.


Next up hemp medallions to hang in the window.

Tuesday, February 7, 2012

I am a Gaget Queen

Electronic gadgets, I LOVE them!  I have a laptop, net book, BeBook reader, PSP, three different mp3 players and that is the small list.  My newest favorite toy is my Kindle Fire, that my husband got it for me for Christmas.  I was really nervous asking for the Fire after reading all the reviews on Amazon...but now that I own it, I can't believe I ever lived without it. (Amazon is not paying me to say this)

So when does the crafting come in?  Well, all of my gadgets NEED cozies, and the Kindle Fire is no exception.  I looked everywhere on the web for a nice cover/case, but all were super expensive and they weren't anything special.  Of course this means I made one.


The cozy is crocheted using Rowan "Cotton Braid" yarn.


I made the button myself.


Wednesday, February 1, 2012

My Sweet Pea


Another Merry Heart-mas present complete!  For the past few Saturdays, my friend and I have been getting together so I can teach her how to crochet.  This has been great for me in many ways.  For one, I am making dedicated "crochet" time and the bonus "girl" time is good for the soul as well.

This pattern is from the book "Stitch 'N Bitch Crochet: The Happy Hooker", called the Sweet Pea Shawl.  It was an easy pattern to follow, but it took a few rows for me to get the hang of it. 


Saturday, January 28, 2012

Happy Birthday

January 28th, 2011 a very special baby came into this world.  He was born very premature, I was only at 22 weeks.  Since he arrived so early, I never got the chance to make him a blanket, even to this day I wish I would of had one to wrap him in when he was born, so for his first birthday I finally made him a special blanket.


Happy 1st Birthday Orlen,
hope your party in Heaven was filled with cake, balloons and love.


Monday, January 23, 2012

Merry Heart-mas!

Christmas is not over at my house.  In fact, in some ways it is in full swing.  No, there is not a Christmas tree in my living room or any decorations for that matter.  Even though I did not get presents, or cards in the mail in time for Christmas, I am still going to finish them and mail them for a new holiday I have created, Heart-mas Day!  After much agonizing over the fact that I was sick and couldn't get presents or cards out, my very dear friend suggested I send out Valentines presents instead, and that is just what I have decided to do. 

This past weekend, I finally finished my sisters Heart-mas present.  A beautiful shawl made out of Bamboo yarn in a rich plum color.  The pattern can be found HERE.


The pattern was easy to follow, it is a two row repeat pattern, so easy to memorize.  I opted for a different edging.  The Bamboo yarn was the best part of working on this project.  It was an absolute delight to crochet with it, soft and silky.  The final project has a wonderful drape and feels nice against the skin.


Edge Directions
Note:  I did not fasten off the yarn, instead started the edging at the end of my last row.

Starting in the corner, chain 5.
Sc in first dc from previous row, sc in tr, sc in next dc, ch 3, dc in ch 2 space, ch 3, repeat until you reach the top edge.  The top is edged with single crochet across, three in each "space" (dc and chain).


Now lets hope my sister doesn't read this blog before she gets her Merry Heart-mas present in the mail.


Thursday, January 19, 2012

Failed Attempt

Since last Friday, I have been working on a tutorial for sea glass coasters.  Unfortunately, as of today, I still don't have any made and have gone through numerous batches of homemade "clay".  I have a great vision in my head and hopefully one day (soon), it will become something.

Other crafts???  Not really. 


Wednesday, January 11, 2012

Don't Throw Them Out

A favorite "hanging around the house" outfit of mine is men's ribbed tank tops and pajama pants.  The tank tops take a bit of abuse, cooking grease splatter, bleach spots from doing laundry and crafting, all take its toll on them.  At some point they they have to retire, but not before they get a makeover and a new leash on life.


At one time, these three tank tops were a solid red, blue and black.  The red was riddled with bacon grease stains all over the front of it, so much so I had stopped wearing it.  The blue and black tank tops had bleached out spots on them.  In an attempt to make them wearable again, I used a bleach tie dye bath.  I am not as happy with the blue and black tank tops as much as I am with the way the red turned out.

Do you want to give an old tank top some new life?  Here is how to make the stripped tank.

First, in a sink or small bucket pour about 1/4" layer of bleach.  If you would like, you can dilute the bleach with a little water.

Next, fold the tank in an accordion, starting from the bottom edge, see picture below.  Just like you fold a paper fan.


Then fold in half, see picture below. Using two rubber bands, wrap them around the folded tank top.  Do you notice the light pink stripes, that is where I wrapped the rubber bands.

Set the tank top in the bleach, do not submerge.  You want the tank to absorb the bleach at it's own speed.  Wait about 5 to 10 minutes, or until you have achieved your desired result.  (I did not time how long my tank was in the bleach.)  When you think it is done bleaching, rinse the bleach off the tank by spraying first with hot water, them cold water on the top.  Notice in the above picture, the tank is red on one side and light pink/purple on the other.  The red was the top and the pink/purple was the bottom.  I did not move the tank in the sink and to rinse, sprayed directly on the top.

Once fully rinsed, undo the rubber bands and wring as much water out of the tank as you can.  Dry and enjoy!


If you have any questions regarding this tutorial, please feel free to email me at hippiemissy@gmail.com


Wednesday, January 4, 2012

Still Christmas?

With the unfortunate sickness I have endured for the last three weeks, Christmas was kind of put on hold.  Anyone I send gifts and cards to, have been ignored.  The plan is to get greeting cards and stuff out by next week.

Almost three weeks ago, I started on my annual Holiday ornaments and only managed to make two of them.  It is my tradition to send a handmade ornament with each of my holiday cards.  This year, a Santa hat!  Although, I may choose something else to send next week as Christmas is over.

I looked everywhere on the Internet for a cute crochet Santa Hat pattern.  Nothing seemed to fit my criteria, easy and quick, so I made up my own pattern. 


Materials
Red yarn, any medium weight will do.  (I used Simply Soft by Caron.)
Lion Brand Fun Fur in White
H Crochet Hook
Yarn Needle
* Optional:  Small or Medium size craft Bell

Pattern
With Red
Ch 3, slst in 1st ch to create circle
Row 1:   Ch 2, 6dc in circle, slst in 1st dc (not the ch 2)
Row 2:   Ch 2, *1dc, 2dc* repeat around, slst in 1st dc (not the ch 2)
Row 3:   Ch 2, *1dc, 2dc* repeat around, slst in 1st dc (not the ch2)
Row 4:   Ch 2, dc around, slst in 1st dc (not the ch2)
Row 5:   Ch 2, dc around, slst in 1st dc (not the ch2)
Row 6:   Ch 2, dc around, slst in 1st dc (not the ch2)

With white.
Row 7:   Ch 2, dc around, slst in 1st dc (not the ch2)
Row 8:   Ch 2, dc around, slst in 1st dc (not the ch2)

Finishing
Fasten off.  Fold white rows up over the red.  Using the white tail and yarn needle, make a small stitch to fasten the white to the red.  With the red tail, create loop by tying the end inside the tip of the hat. 

Variations
Add bell to top of hat.
Using the White Fun Fur yarn, whip stitch a few times at the top of the hat to create a white "pom pom" looking top.
If you leave a long tail in the beginning, you can make a crochet chain loop to hang it.


* If you have any questions, or find any problems with this pattern, please let me know.