Wednesday, December 28, 2011

Lucky Dog

Still suffering from the awful sinus infection!  Can you believe that?  It is true, although for the last two days I can actually say it feels a tad better (but only a tad).  Christmas was such a bust and I feel awful about it.  No one even received a card this year.  I think I have a way to remedy that though.

Last Friday, feeling defeated by the sinus infection and wanting to give it the big "up yours", I decided to make dog treats for my dog Kane. 

I used a recipe from the book, "Real Food for Dogs", called Great Gravy Cookies.


Ingredients I used:
(slightly modified from book and amounts have been doubled)

5 cups whole wheat flour
4 small jars beef-flavored baby food
1 cup rolled oats
2 eggs
1 cup nonfat dry milk
1 cup water
2 Tbsp brown sugar
1 package bacon, cooked and crumbled

Preheat oven to 350 degrees. Combine all ingredients in a large mixing bowl. Lightly pat your hands with flour and shape the mix into a big ball. Flatten the ball using a floured rolling pin. Use a cookie cutter to cut the dough into shapes. Place the cookies on a greased cookie sheet (I did not grease the baking sheets and did not have a problem with sticking). Bake for 25 minutes or until lightly browned. Allow the cookies to cool before serving and store them in an air-tight container in the refrigerator.


Kane says they are delicious!


Tuesday, December 20, 2011

Hello...hello...Is this thing on?

Have you ever suffered from a sinus infection? 

Two Sundays ago, my head was pounding and congested.  I fought thru it for two days at work till I couldn't take the headache any longer.  Vitamin A, Garlic pills, Vitamin C and lots and lots of ibuprofen and rest.  After a week there was little improvement.

I did see my doctor yesterday and was prescribed antibiotics, although for now I am not able to feel any of their healing powers...maybe in another day or two.

Some may ask, well what about Christmas?  Well I don't have a tree up, I haven't bought any presents, I haven't made any presents, no stockings hung with care....to sum it up, my house looks like bah hum bug! 

Thursday, December 8, 2011

Hard at Work

Every Christmas, I always take on more projects than I could ever accomplish...but if I even get half of what I want to make finished then I will be happy.  Last weekend I made a trip to the local yarn shop to buy supplies for a couple shawls.  I walked out with a load of yarn from the "sale" table, all $4.00 per skein.


On the table, the Elise Shawl and the Sweet Pea Shawl.  Still unsure who will received these.  The Elise Shawl is almost complete, maybe 6 to 8 more rows.  I have been working on it since Sunday. Last night I felt bored with that pattern so, figured I would change things up and start on the Sweet Pea Shawl. 

What a disaster!  I sat down and started the 202 foundation chains...around 160 I lost count.  After recounting and re-reading the pattern I was ready to start on the first row. 

The first row on the foundation chain is always the most tedious.  All the counting and looking for the tiny back loop to insert your hook and nothing to really hold on to, it is very time consuming.  At the end of the first row, in what seemed to take hours, I noticed I had extra foundation chains.  Hmm, I must of (re)counted the foundation chain wrong.  I started on the second row and got three quarters of the way across, when I discovered a mistake on the first row.  The only way to fix it...to undo everything all the way back to the mistake.

Take two.  Trying to be more careful, I take even more time completing the first row.  Start on the second row.  Halfway across....another mistake found on the first row.

Deep breath.....count to ten.....scream a little out loud.

Take three.  This time I paid all of my attention to crocheting the row.  I blocked out the TV, my husband, my cat trying to love on my elbow and my dog asking to go outside.  This row was going to get done, even if took me till 3 in the morning.  At the end of the row I had to add back the "extra" foundation chains.  I also looked very carefully at the row to make sure there weren't any mistakes....it was perfect.  After re-crocheting the first row so many times I was exhausted.  I made it through row two and half of row three when I set it down for the night.


Saturday, December 3, 2011

Only 22 T-Shirts


FINISHED!!!!!

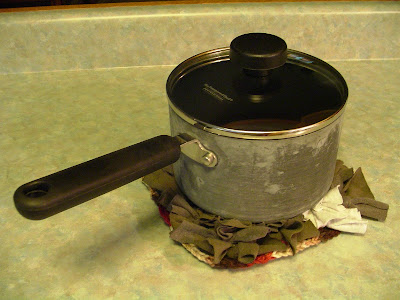
It only took 22 t-shirts and a few hours to finish, ok more than a few hours, but it is finished, and it is beautiful!  The time it took to make this rug was well worth it.  Will there be more rugs like this in my future, probably not.  There will be more pot holder though, they only took a night to finish.


Tuesday, November 29, 2011

Thanksgiving

It was a wonderful day.

The alarm buzzed at 6:30am.  I immediately got started on making the stuffing, and preparing the turkey.  Yes I am a vegetarian and yes I still cooked a turkey...I am the only one who doesn't eat meat, have to please the masses.

Before I knew it the big football game was about to start...my husbands Green Bay Packers Vs. my Detroit Lions for the Turkey bowl.  This has been a much anticipated football game in my house.

The in-laws came over around 1:30 and the meal was done around 3.  Everything turned out just as I had hoped, delicious.

Hope everyone had a wonderful Thanksgiving.

Tuesday, November 22, 2011

Counting Down to Thanksgiving...Day 4, 5 and 6!

The decorating and crafts are the fun part of planning a dinner, but half of the preparation is cleaning.

Day four was spent reorganizing the kitchen.  The goal is to have almost nothing on the counters, to give plenty of room to prepare and serve all the food.

Day five, well I took day five off....It is important to take time off for football.  Go Lions!

Day six and another turkey.


The pattern for this turkey came from CraftPassion.com.  The only modifications to the pattern is the head and I did not crochet a back piece. 

Gobble, Gobble...

Friday, November 18, 2011

Counting Down to Thanksgiving...Day 3

Did you know you only have 6 more days to plan for the big feast? 

The trip to the supermarket was not as wonderful as I had hoped.  Unfortunately, the seas were bad and the ships loaded with food were delayed.  So instead of stocked shelves, they were empty.  Produce was very limited....not even one bunch of celery, even the frozen vegetables were hard to come by.  The only milk available was fat free.  I could go on and on, but I will save you my rant, and at least about 75% of my shopping list was found.

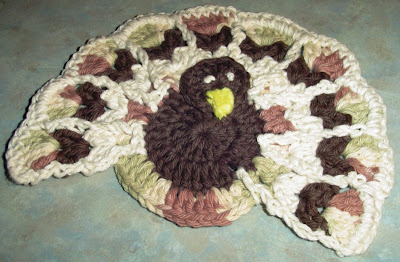
Regardless of the difficult shopping trip, my Thanksgiving spirit is still in tact.  When I was able to settle down and relax for the night, I whipped together a Turkey Pot Holder.


I used this pattern....Click Here!  by Yarn Pixie.

The pattern was written very well, but I wanted it a little bigger.  Here are my changes.....

*  I added a fourth row to the body...Ch 2, dc in same stitch, (1 dc in next stitch, 2 dc in next stitch) repeat till end, join with sl st in top of ch 2.

*  I added a fourth feather...on row one I made 25 sc, this includes the sc to join the yarn to the body.  For row two, repeat (sk 2 sts, 7 dc in next st, sk 2 sts, ss in next st) four times, instead of three.  Row three, repeat (hdc, sk next st, 7 dc in next st, sk next st, hdc, sk next st) three times, instead of two.  As you can see, I also used three different yarns for the feathers.

*  I made the head a little bigger.  I started with 6 sc and repeated row 4.  The number of stitches are different than the patterns count, so I just repeated what the patterned called for.  Example:  Pattern says for Row 5 - sc 2 tog, 2 sc, sc 2 tog, ch 1, turn.....I repeated sc 2 tog, 2 sc till I was at the end.

*  I made the legs a little larger.  Ch 6, 6sc in 2nd ch from hook, sc back loop of next ch, repeat down the chain for a total of 4 sc, join to body, fasten off.


If you have any questions about my changes, feel free to email me at hippiemissy@gmail.com

Thank You Yarn Pixie for a wonderful pattern!!!


Thursday, November 17, 2011

Counting Down to Thanksgiving...Day 2

When preparing for a dinner party the first thing you have to decide on is of course the meal.  I have learned the hard way, that when you live on an island, you must buy the holiday food essentials early!  Last year, my family made last minute plans.  This meant that the day before Thanksgiving, I was at the store searching for pumpkin pie mix, pie shells and cool whip.  In the real world this would be ok, not here.  Of the two stores to shop on the island, one was completely sold out of pumpkin pie mix, and whipped cream.  The other store had pumpkin pie mix, but I had to buy whipped cream in the aerosol can.  In the end, we were able to enjoy pumpkin pie, but the shopping trip was not fun.

This year, I made sure to get everyone to make a plan.

The menu......
A Very Traditional Thanksgiving Feast

Turkey
A basic roasted Turkey, smothered in butter and herbs,
cooked on a bed of onions, carrots and celery.

 Prepared inside the turkey and in a casserole pan.

Gravy


This is because vegetarians, like me,
need something more than just side dishes.

Pumpkin Pie


Tuesday, November 15, 2011

Thanksgiving Countdown


There is exactly one week, seven days, 168 hours, or 10,080 minutes to prepare for Thanksgiving! (not counting today and Thanksgiving day)  It is amazing how much preparation goes into a meal that is devoured in less than an hour.  This year, Thanksgiving Day will be celebrated at my home.  This is exciting, because I love hosting dinners and parties.  The planning, the decorating, the cooking....puts me in my happy place. 

Day one of the count down, felt fall leaves to decorate the kitchen counter where the food will be served.  Found the pattern on Martha Stewart.com


Friday, November 11, 2011

Hungry?

Wow you must be hungry!  I haven't shown any new recipes in a very long time.  This is not my favorite page in the book, but it is one of the favorites from the book.  Last weekend I went to the local hardware store and was helped by one of the semi regular poker playing guys. 

"I tried to recreate one of your recipes."  He said.
"Really?  Which one?"
"The Ham and Cheese Bagels.  But I couldn't get them like yours."
Insert slight blush here.  It certainly makes a girl feel good when complemented on her cooking.

These will not disappoint your party guests or family.  So without further ado, the highly requested and easily put together....

Ham and Cheese Pizza Snacks

(Since I made the above recipe page I have modified it slightly)

Ingredients:
Shredded Colby Cheese
Sliced Deli Ham (I use packaged sandwich ham slices)
Mayonnaise
Mustard
Italian Seasoning, Pepper
Bagels, Full Size

Directions:
In a bowl, combine the Cheese, Ham, Mayo, Mustard and seasonings.  Spread over Bagels.  Place on an ungreased baking sheet.  Broil about 6 inches from heat for about 4 minutes, or until cheese starts to turn golden brown. (see picture)  Serve hot.

To serve to a group, divide each bagel into four pieces.


Tuesday, November 8, 2011

Something Quick


Another project for the spare room...a stuffed animal hammock.  You have seen them everywhere, this is not a new idea.  These guys were resting on the day bed and needed a place to call their own.  With a ball of t-shirt yarn I whipped this up in less than an hour.

I used the removable hooks, you can buy them at any department store, to hang the hammock.  I liked this idea because then the hooks won't harm the walls.


*Pattern and instructions will be available soon.  If you would like to know how to make this project email me at hippiemissy@gmail.com.


Friday, November 4, 2011

Old Jeans Get a New Life

Old jeans are one of my favorite clothing items to re-purpose.  The material is tough, lays out flat without needing to iron and has supplies lots of odd bits to use like labels, zippers, etc.

In an attempt to get myself back on the treadmill and into shape, the "exercise/guest/storage" room in my house is getting a make over to make it more inviting and comfortable.  In what I will now refer to as the Girl Cave, because why can't we have a one too, is a daybed used as a couch.  For the longest time, all that has covered the futon mattress has been fitted sheets. 

Last night that changed, I pulled out all the old jeans I had stored in the craft room and started cutting out 16" x 16" squares.  I was able to come up with 20 of these squares.  After deciding on the layout to the sewing machine I went.  Just a simple quilt.

A perfect fit!


One more row may be added, so the cover can tuck under the bottom part of the cushion.  Plus a back still needs to be added (or not).

Thursday, November 3, 2011

Not More Knots

Knot, knot, knot, knot......oh yeah and then Knot some more.  Slowly, but steadily the rag rug is coming into shape.  It is about two thirds done.  I have it laying on the floor waiting for my husband to dig thru his closet and find more t-shirts he doesn't wear.  I had not realized how many shirts I would need in order to make the rug as big as it is.  BUT, it looks wonderful!!!!!!

My dog, Kane, has already claimed it as his.  Everytime it is laid on the floor, he makes his way over to it, then stares at me with a "will you finish this thing already" look on his face.

Monday, October 24, 2011

Just call me a workaholic.

Yes it has been two weeks since my last post. If you have been reading this blog for any length of time, it happens during this time of year, every year. Tax deadlines.....to put it as simple as I can....tax deadlines suck.   They suck my time, energy and creativity.


At this point, I get two and a half months till the next deadline takes over my energy.  To really challenge myself, the rag rug is underway.


Little did I know, it is going to take longer than expected.  (what's new right?)  I had a skein of black that I thought would be enough for the base.  After fastening it off, I realized that base needed to be much larger.  Two half skeins of blues later, it finally was a good size.  Then came time to start attaching the strips.  I knew I did not have enough strips cut up, but I did not realize just how short I am. 

The rag rug will take quite some time to complete, but it is going to look so neat.

Monday, October 10, 2011

A Visitor


Finally a visitor to the Bird House!! 


I have been waiting weeks for a bird to come to this bird house...WEEKS!!  My husband spotted a few of these little birds flying around and alerted me to the small frenzy outside.  I started jumping around like a two year old that just received a lolly pop, grabbed my camera and was able to capture this little guy perched getting ready to get some seed from inside.


Friday, October 7, 2011

Under the Covers

I have had this sketch book for a really long time, maybe 5 or 6 years.  For a long time it sat with only a couple pages drawn upon.  One day I picked it up and decided that it would serve as a "sketch/journal" for clothing design.  Inside it would house cut out pictures of clothing that inspired me, sketches of my own imagination and notes.  Basically an inspirational book to keep everything together in one place.

I had tore off the cover, that I created a collage on and didn't like, when I decided the new purpose of this sketch book.  For months it sat naked, without a cover...till the light bulb went off.  A crocheted cover! 


This cover is crocheted directly to the spiral binding.  The pattern was made up as I went along and hope to write it out to share.  For the final touch, used modge podge to stiffen yarn and create a hard cover.  


Tuesday, October 4, 2011

Princess of Quite A Lot


The rag rug is taking a lot longer than expected...either that or my motivation for that project hit a low.  To break up the monotony, I made this tiara for my soon to be three year old niece.


This was a really really quick project.  Took less than an hour and only a small amount of yarn.  My niece's birthday is at the end of the month, so I have began making a few things for her.  Not sure if she appreciates her Auntie M's handmade gifts as much as I enjoy making them, but till I know different I am going to keep making her things.


Wednesday, September 28, 2011

Eat, Sleep, Work! Repeat.

Haven't been able to get any finished projects done of late.  It is that time of year, where my "real" job sucks all of my energy and creativity.  I hate tax deadlines!!  (and "real" jobs, why didn't I choose to be a go-go dancer?)

After logging into blogger, to read various blogs that I follow and feeling really bad about not posting, last night I pulled out my rotary cutter and, despite my aching back and tired eyes, started work on the rag rug.


A year ago, with some left over dye, I tie dyed three old t-shirts to be used at a later time.  I love how each shirt became a different shade of blue.  These t-shirts were my inspiration for making the rag rug.  The rug is going to be about the size of a kitchen mat, maybe a little bit bigger.  The colors will form an ombre effect, with speckles of black throughout.

Still to do, cut black strips, finish crocheting the base and put together. 

Thursday, September 15, 2011

"From grease to shine in half the time".

I was taught how to make these Tulle Dish Scrubbers, by my wonderful Aunt in Law, three years ago.  (and have had the tulle strips cut out and bundled together that long) Unfortunately, last night when I wanted to work on these and finally turn the little bundles of tulle into dish scrubbers, I couldn't remember all the instructions she told me.  So I improvised.


Tulle Dish Scrubber 

Materials:
Size P Crochet Hook
Tulle
Large eye yarn needle

Directions:
Cut tulle into 3" wide strips.  You will need two of these strips to make one scrubber, or a total of 6 yards.

Chain 3, join with slst in first ch to make ring.

R1:   Ch 1, 8 sc in ring, slst in first sc.

R2:   Ch 1, 2sc in each sc from previous row (16 sc), slst in first sc.

R3:   Ch 1, sc around. (16 sc), slst in first sc.  (About halfway thru this row you will need to join the 2nd strip of tulle.  To do this, with about 4 or 5 inches left on the 1st strip, take the 2nd strip and overlap them.  Roll the sides up to "lock" them together.)

R4:   Ch 1, sc around (16 sc), slst in first sc.

R5:   Ch 1, sc2tog around, (8 sc), slst in next stitch.

Fasten off, but do not cut the remaining tail.  With yarn needle and remaining tail sew "hole" together.  Knot.  Tuck the remaining tail into the center of dish scrubber.


If you have any questions or problems with the pattern, please feel free to email me at hippiemissy@gmail.com.


*  Title is taken from the Joy Soap commercial.


Wednesday, September 14, 2011

A Very Berry Harvest


Salmonberries this year was a bust.  I believe with all of our nice weather, it was too sunny and hot for them.  I could be wrong but that is the only explanation I can come up with.  The raspberries on my property however, are abundant!  The bushes are taller then ever and there are more berries than I have the patience to gather. 

I was able to make two batches of jam last night and intend on gathering some more berries in a couple days.  Still no crochet but my pantry is starting to look really good.


 (From Left to right, Fireweed Honey, Raspberry Jam, the last 6 jars of Salmonberry Jelly from last year.)

Sunday, September 11, 2011

Summers Over

They say that when the fireweed flowers bloom to the top of their stalk, summer is over.  About two weeks or so ago, there was an article in the local paper about fireweed honey, including a simple recipe.  At the time there were tons of fireweed blooming all over the place, even some in my neighbors back yard.  I procrastinated and didn't go out in search for fireweed till yesterday.

I buy my dog and cat food from a feed store out the road, it is 10 miles out of city limits.  I am sure this seems like nothing to folks that live in big cities, but for me this is a little bit of a drive.  So yesterday, I load up my dog, Kane, some baggies, my camera and head out to get pet food.  The goal was to look for a patch of fireweed that would yield at least two cups of lightly packed flowers.

I drive and drive and drive and it appears that I have missed the mark.  All the fireweed patches are void of any flowers, or only have a few left on them.  After an hour or so of driving I give up and take Kane home.  My husband calls, from work, asking if I will take him some cold medicine.  I agree, and too my delight on the way there I see a small patch of fireweed.


I picked every flower I could get my hands on.  After plucking all the flower off, I had 4 lightly packed cups of flowers!  Enough for 2 batches.


Single Recipe:  (makes 2 pints)
from www.wildsalmonkitchen.com/blog/

1 1/4 cup of water
5 cups of sugar
1/2 tsp alum
1/4 cup of light Karo syrup
2 cups of lightly packed fireweed blossoms

On the stove, stir water, sugar and alum until it comes to a boil.  Watch until the liquid changes from cloudy to white.  After the syrup turns from cloudy to clear, remove from heat.  Add the washed blossoms to the hot syrup.  Stir and let steep for 10 minutes.  Strain out the flowers.  Bring to a boil again.  Pour into sterilized jars.  If not sealing jars, store in refrigerator.


This is really, really easy to make!  I have yet to taste the honey, but if I approve, some lucky people will be getting some for Christmas.


Thursday, September 8, 2011

Blank


That is my creative mind this past week.....blank, empty, blah!  I have hemmed pants for a friend though, does that count as crafting.  Probably not. 

Work as usual is getting in the way with my creative mojo.  Really wish I could craft full time for the same salary I am making, but I am sure that is a pipe dream right now.

Also this past week, my oven broke, the hot water heater broke and my husbands truck went into the shop...can you see why I haven't been in the mood to craft?

Anyways enough of my complaining.  It is going to give me wrinkles.

Thursday, September 1, 2011

Smile, It will make your day better.

The other day a good friend was over and while we were chit chatting away sitting the couch, she spotted one of my afghans draped over the back of the couch.

"Did you make this?"
"Yes"
and then the question...
"Would you make me one?"
 "Sure."
then the demands...
"Can you do Smileys in it?  And not so holey, and and..."

After she left, my mind was racing with ideas.  What would be the best way to make a blanket with smiley faces incorporated into it?  Filet crochet? Surface crochet? Tapestry crochet?  Embroidery?  This project is going to take some testing.

Test #1:  Filet Crochet

To start, I created a "Smiley Face Graph" using my computer.  I created a 20 x 20 square graph, where each square is one "Mesh".  I pulled out some cheap acrylic yarn from my stash and following the chart, went to work.

Here is how it turned out.


The project is 18" wide by 12" tall.   (The size is perfect for a place mat.)  The Smiley Face turned out well and I think it would be good for a subtle design element.

Would you like to make your very own Smiley Face?


Smiley Face Filet Crochet Chart
Materials:
Any worsted weight yarn.
Size H Crochet hook
Yarn needle for weaving in ends.

Directions:
Chain 65.
DC in 8th Ch from hook. 
*Ch 2, skip 2 ch, DC in next chain.*  Repeat from * to * across. (You should end up with 20 open squares.)

Chain 2.  Turn.

Now you will start following the chart.
  • Start with the bottom row.
  • Even rows worked from Right to Left.
  • Odd rows worked from Left to Right.
  • Each square is one "mesh".
  • White squares are "closed" mesh. 
  • Black squares are "open" mesh.
Here are the first two rows written out...

Row one of chart, (or row 20):
*Two DC into ch 2 space, DC into DC from previous row.*  Repeat from * to * across. (20 "closed" mesh)
Chain 2.  Turn.

Row two of chart, (or row 19):
15 DC (or 5 "closed" mesh), *ch2, skip 2, DC*, repeat from * to * 11 times (or 12 "open" mesh). 15 DC(or 5 "closed" mesh).
Chain 2.  Turn.


If you have any questions or problems with the instructions or how to Filet Crochet email me at, hippiemissy@gmail.com


Wednesday, August 31, 2011

The Learning Curve

I am trying to make use of my many crochet books.  The one I am diving into right now is "Beyond The Square, Crochet Motifs" by Edie Eckman.  This book is filled with crocheted triangles, squares, circles, hexagons and more.  It is a granny blanket heaven.  I am just starting to get interested in motifs and granny "squares".  I think they are beautiful, but I am not a fan of weaving in ends and these motifs require a lot of weaving ends in.

Something that I am really enjoying, is learning and practicing stitches that I don't normally do.  I have seen them, but I don't normally incorporate them into my work....but I will from now on.


The squares in the picture above is what I have made so far.  The square on the far left is made of Popcorn stitches.  The square on the far right is the Leaning Tower stitch.  What am I going to do with these?  Well you will just have to wait and see.  (Unless I don't like it, then you may never see.)

Tuesday, August 30, 2011

The After Party....way after the party.

I don't think I will ever get the food blogs posted on the same day each week, but at least I still am writing them.  Everyones' had the "7 Layer Dip" at parties, right?  I love to make it.  It is easy and fast to put together.  Here is a new twist on the traditional "7 Layer Dip".


Mexican Roll Ups

Ingredients:
Tortillas
Refried Beans
Shredded Mexican Cheese Blend
Sliced Olives
Guacamole
Chives
Serve with Sour Cream

Directions:
On tortilla, spread a layer of Refried beans, sprinkle a layer of cheese.  Make line of olives, guacamole and chives (refer to picture).  Roll up tortilla, slice, and ENJOY.

Note:  You can heat the beans before you put it on the tortillas, it makes the beans a little easier to spread.  You can also put them in the oven covered with foil to warm them, but do this before you cut them.


* If you try any of the After Party recipes, I would love to know what you think. If you changed them up, I would love to know what you did. Email me or comment on this post.


Wednesday, August 24, 2011

Don't Forget to Accesssorize

Another attempt at a pattern from one of Leslie Stanfields books, this time from "100 Flowers to Knit & Crochet".  With full knowledge that my ability to follow gauge is...well poor, (mainly because I like to play with different yarns that may not be what the pattern calls for, and I also like to use up my stash instead of buying new yarns)  I still wanted to try some of the flowers in this lovely book.  Hoping to not have a bunch of ends to weave in, I picked a really simple three color flower.


I used bits and pieces of cotton yarn.  Didn't need much.  For some people a little big, but for me, I think it turned out just the right size!  After using a spray starch to shape and stiffen the petals, I used the fabulous E6000 glue to attach a simple hair clip.


This project took absolutely no time at all.  Reading and figuring out the pattern took the most time.  More of these hair clips coming soon.  Maybe I will make all 100 flowers from the book?!?


Friday, August 19, 2011

Success on the 1st Try

It only took me all week to motivate myself to make something...  This week has been a struggle, but with girls night cancelled and my husband out of the house for a few hours, I finally sat down and got my hands busy.  Crafting may be like a drug to me...I get such a satisfaction and joy from making things.  When I am in a blah mood, if I can get myself to craft, I almost always feel better. 

This idea has been bouncing around in my brain for the last week.  A rag rug, using old t-shirts with a crochet mesh backing.  Instead of just jumping in head first and tackling something as big as a rug, I decided to try a 5" x 5" pot holder first. I am so very happy with the way it turned out, I kind of wish I would of just made the rug.


The pot holder turned out exactly as I wanted it to, which I find amazing!  I have written up a pattern and will be sharing very soon if anyone wants it. 


Sunday, August 14, 2011

Left Overs

What do you do with lots of left over chicken strips?  You use them.  The guys must of not been too hungry Friday night or I bought way too much, but have no fear nothing will go to waste. 

I present to you, Crispy Chicken Pot Pies:
Original recipe by Handmade Peace.


Ingredients:
Tyson Crispy Chicken Strips
Cream of Potato Condensed Soup
Milk
Pepper, Garlic, Dried Onion
Frozen Peas and Carrots
Biscuits
Shredded Medium Cheese

Directions:
Cook chicken according to package, chop into small cubes.  Heat Cream of Potato and milk on low heat till warm.  Cook peas and carrots till soft (but not mushy) Cut each biscuit into halves, and press into muffin pan.   Mix cream of potato and cooked peas and carrots.  Layer in each biscuit cup...chicken, cream of potato mixture and a pinch of cheese.

Bake at 375 degrees for about 15 minutes.


* If you try any of the After Party recipes, I would love to know what you think. If you changed them up, I would love to know what you did. Email me or comment on this post.


Thursday, August 11, 2011

Being Lazy

Not completely lazy though!


This hat has been complete since Sunday, but I have been very lazy with taking pictures and blog posts are more exciting with photos!  I bought this pattern HERE.  This is actually my third attempt at the pattern.  The other two hats came out too small, so I added a row of Double Crochet...and IT FITS.


This two tone hat was complete in two nights.  Made with Peaches and Creme black and white. Using Crochet hooks J and G.  Pattern is really easy to follow and is flawless. 

Wednesday, August 3, 2011

Tweet Tweet


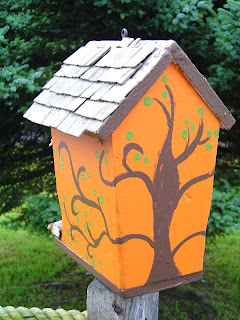
This sad little bird house was saved and traveled with me when we moved three years ago into our house.  Many times, while living in the trailer the bird house would fall to the ground in heavy stormy weather.  Every time it would happen, I would pick it up and place it back in the tree.  Hind sight would tell me, that if I wanted it to stay in the tree, I should of just fastened it better.

When we moved, I insisted on bringing it with us.  I am not sure why, it wasn't even mine in the first place, just left by the last renter, but I am sort of attached to it.   For the last three years though, it has been neglected, sitting in the dark, on a shelf in the shop.  It sat there because I wanted to paint it and make it better, but never made the time to just do it.  Till now!


I painted the entire thing with regular house paint.  Added some new sticks and a new perch.  This will be the perfect little home for a family of finches. (and this time I will fasten it better to the tree.)

Back View


Front View

Tuesday, August 2, 2011

One Night Stand

As rewarding as it is to finish a big project like a blanket, or clothes...it is just as rewarding to start something and finish it all in one night. This last weekend I put my last store bought wet cloth on my swifter to clean my floors. I vowed that once they were all gone, I would only use reusable cloth. That also meant that I needed to start making some. So, I sat down on the couch for the night with a ball of Peaches and Creme cotton yarn, an H hook, a simple pattern and turned on Celebrity Rehab with Dr. Drew.

This first one is to get a feel for what will work the best.  I want to experiment with different stitches and patterns that will maximize the cleaning power.  I found the pattern HERE, but will be making my own pattern for future ones.
 
It is a tight to put on, but I think that is a benefit, unless after washing it shrinks to much.  I have not used it to clean the floors yet and that will be the biggest test. 


My swifter sure is pretty now, don't you think?

Sunday, July 31, 2011

The After After Party

This recipe is another one of my favorites.  Although, I don't make food or add recipes to the book that the guys don't like.


Stromboli Slices
by Taste of Home Recipes


Ingredients

Refrigerated crusty French loaf
Olive Oil
1 teaspoon of Minced Garlic (found in jars)
Dried Italian Seasoning
Sliced pepperoni
Shredded mozzarella cheese
Meatless spaghetti sauce, warmed

Directions
Unroll loaf of dough at the seam into a square; cut in half. Combine oil, garlic and basil; brush lengthwise down half of each rectangle to within 1/2 in. of edges. Layer brushed side with pepperoni and cheese. Fold plain dough over filling and pinch edges to seal. Place on greased baking sheets.

Bake at 350° for 10-15 minutes or until golden brown. Cut into slices. Serve warm with spaghetti sauce. Yield: 1-1/2 dozen.


The recipe is easy to make and depending on how thin you slice it will feed quite a few.  I always tend to cut thing big for the guys.  I think they appreciate the bigger bites.  My only problem is that the insides always tend to ooze out, but poking a few holes in the top helps.


* If you try any of the After Party recipes, I would love to know what you think. If you changed them up, I would love to know what you did. Email me or comment on this post.

Wednesday, July 27, 2011

Failed Butterfly Hairclip

While browsing the craft section at the store, I found some hair clip blanks.  Immediately my thoughts turned to the book "75 Birds, Butterflies & Little Beasts to Knit and Crochet by Leslie Stanfield".  A friend gave me this books months ago for my birthday, and up until two days ago I hadn't made anything from it.

A butterfly, or oak leaf, or mushroom hair clip, wouldn't that be adorable....I choose a butterfly to start with, should be simple enough, right?  The butterfly came out really well.  Although this pattern had so many ends to weave in, I am unsure if I will make it again.


The only problem is that it turned out to be 5" x 5.75", and the clips are not that big (or my hair)...


For now it is going to be a coaster for my coffee cup at work.  Maybe I should work on scale and gauge some more.


Pattern is also available for free, at LionBrand.com

Saturday, July 23, 2011

The Saturday After Party...

The Saturday after party is back, formerly known as "Finger Food Fridays".  The following recipe is a huge hit with all the guys.

Today I give you...

The Taco Chicken Ring


I found the recipe at the Taste of Home website, direct link to recipe HERE

Ingredients:
2 tubes refrigerated crescent rolls

Finely crushed tortilla chips, divided
Finely chopped rotisserie chicken
shredded Mexican cheese blend
Mayonnaise
Chopped green chilies, undrained
Chopped pitted ripe olives
Tomato, chopped
1 tablespoon taco seasoning


Directions:
Unroll crescent dough. Sprinkle with 1/4 cup tortilla chips; press down gently. Separate into 16 triangles.

Place wide end of one triangle, chip side down, 3 in. from edge of prepared pan, with point overhanging edge of pan. Repeat with remaining triangles, overlapping the wide ends (dough will look like a sun when complete). Lightly press wide ends together.

In a small bowl, combine the chicken, cheese, mayonnaise, chilies, olives, tomato, taco seasoning, and remaining tortilla chips. Spoon over wide ends of dough. Fold points of triangles over filling and tuck under wide ends (filling will be visible).

Bake at 375° for 20-25 minutes or until golden brown.


The only down fall to this recipe is that there is never enough.  The guys love this one and there is hardly ever leftovers.  I usually make two.


* If you try any of the Saturday After Party recipes, I would love to know what you think. If you changed them up, I would love to know what you did. Email me or comment on this post.